Basically, any photo is determined by three parameters:
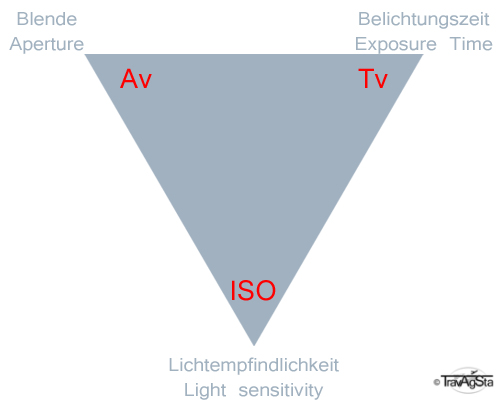
Aperture:
You can open or close the aperture. By this you decide, how much of the available light comes to the sensor. The share of the maximum is the measurement unit. 1:2 means, that 50% of the light comes through, 1:10 is equivalent to 10% and 1:100 to 1%. Often, only the part after the colon is mentioned with an opening ‘f’: f2, f10, f100. This is a bit confusing, as a higher value means a smaller opening of the aperture and vice versa.
Exposure time:
Exposure time is simple to explain. It’s just, how long you raise the mirror and light is falling on the sensor. A longer exposure time leads to brighter pictures. The longer, the more difficult not to shake the picture. Rule of thumb: With a common lens you can easily keep your picture steady until 1/20 s (with a telephoto it’s shorter). If you want to use longer exposure times (e.g. in darkness) you should rest your camera on a tripod (or whatever you have with you).
Light sensitivity:
ISO value tells you the sensor’s light sensitivity. Setting it higher, your pictures will be brighter. This comes with a price: From a certain value (depending on the software), noise is produced. That’s just not beautiful and spoils your pictures. The larger your pictures are (for example when printing posters), the more you see it. As you almost never know before, what you want to do with your photos later, you should always keep that in mind.
The ‘magic triangle’:
I chose the upside down triangle deliberately. I always try to balance aperture and exposure time, while changing ISO only, if it is the only way to do. So, it always has to be balanced, while the ISO shifts the whole thing up or down.
I always choose Program mode P as basic setting (aperture and exposure time are set automatically, depending on the situation). I don’t set ISO automatically, but on the lowest level. Only if necessary, I increase it (slightly). The other modes (Av, Tv, M) are useful for special situations.
The names and settings are valid for my Canon DSLR. Other brands use slighty different names, but are identically in functions.
The right settings
All three parameters play together to determine the brightness. Side effects are, what is focussed, how good the picture qualiy is and what special effects you want to achieve. I show you some examples for those special situations.
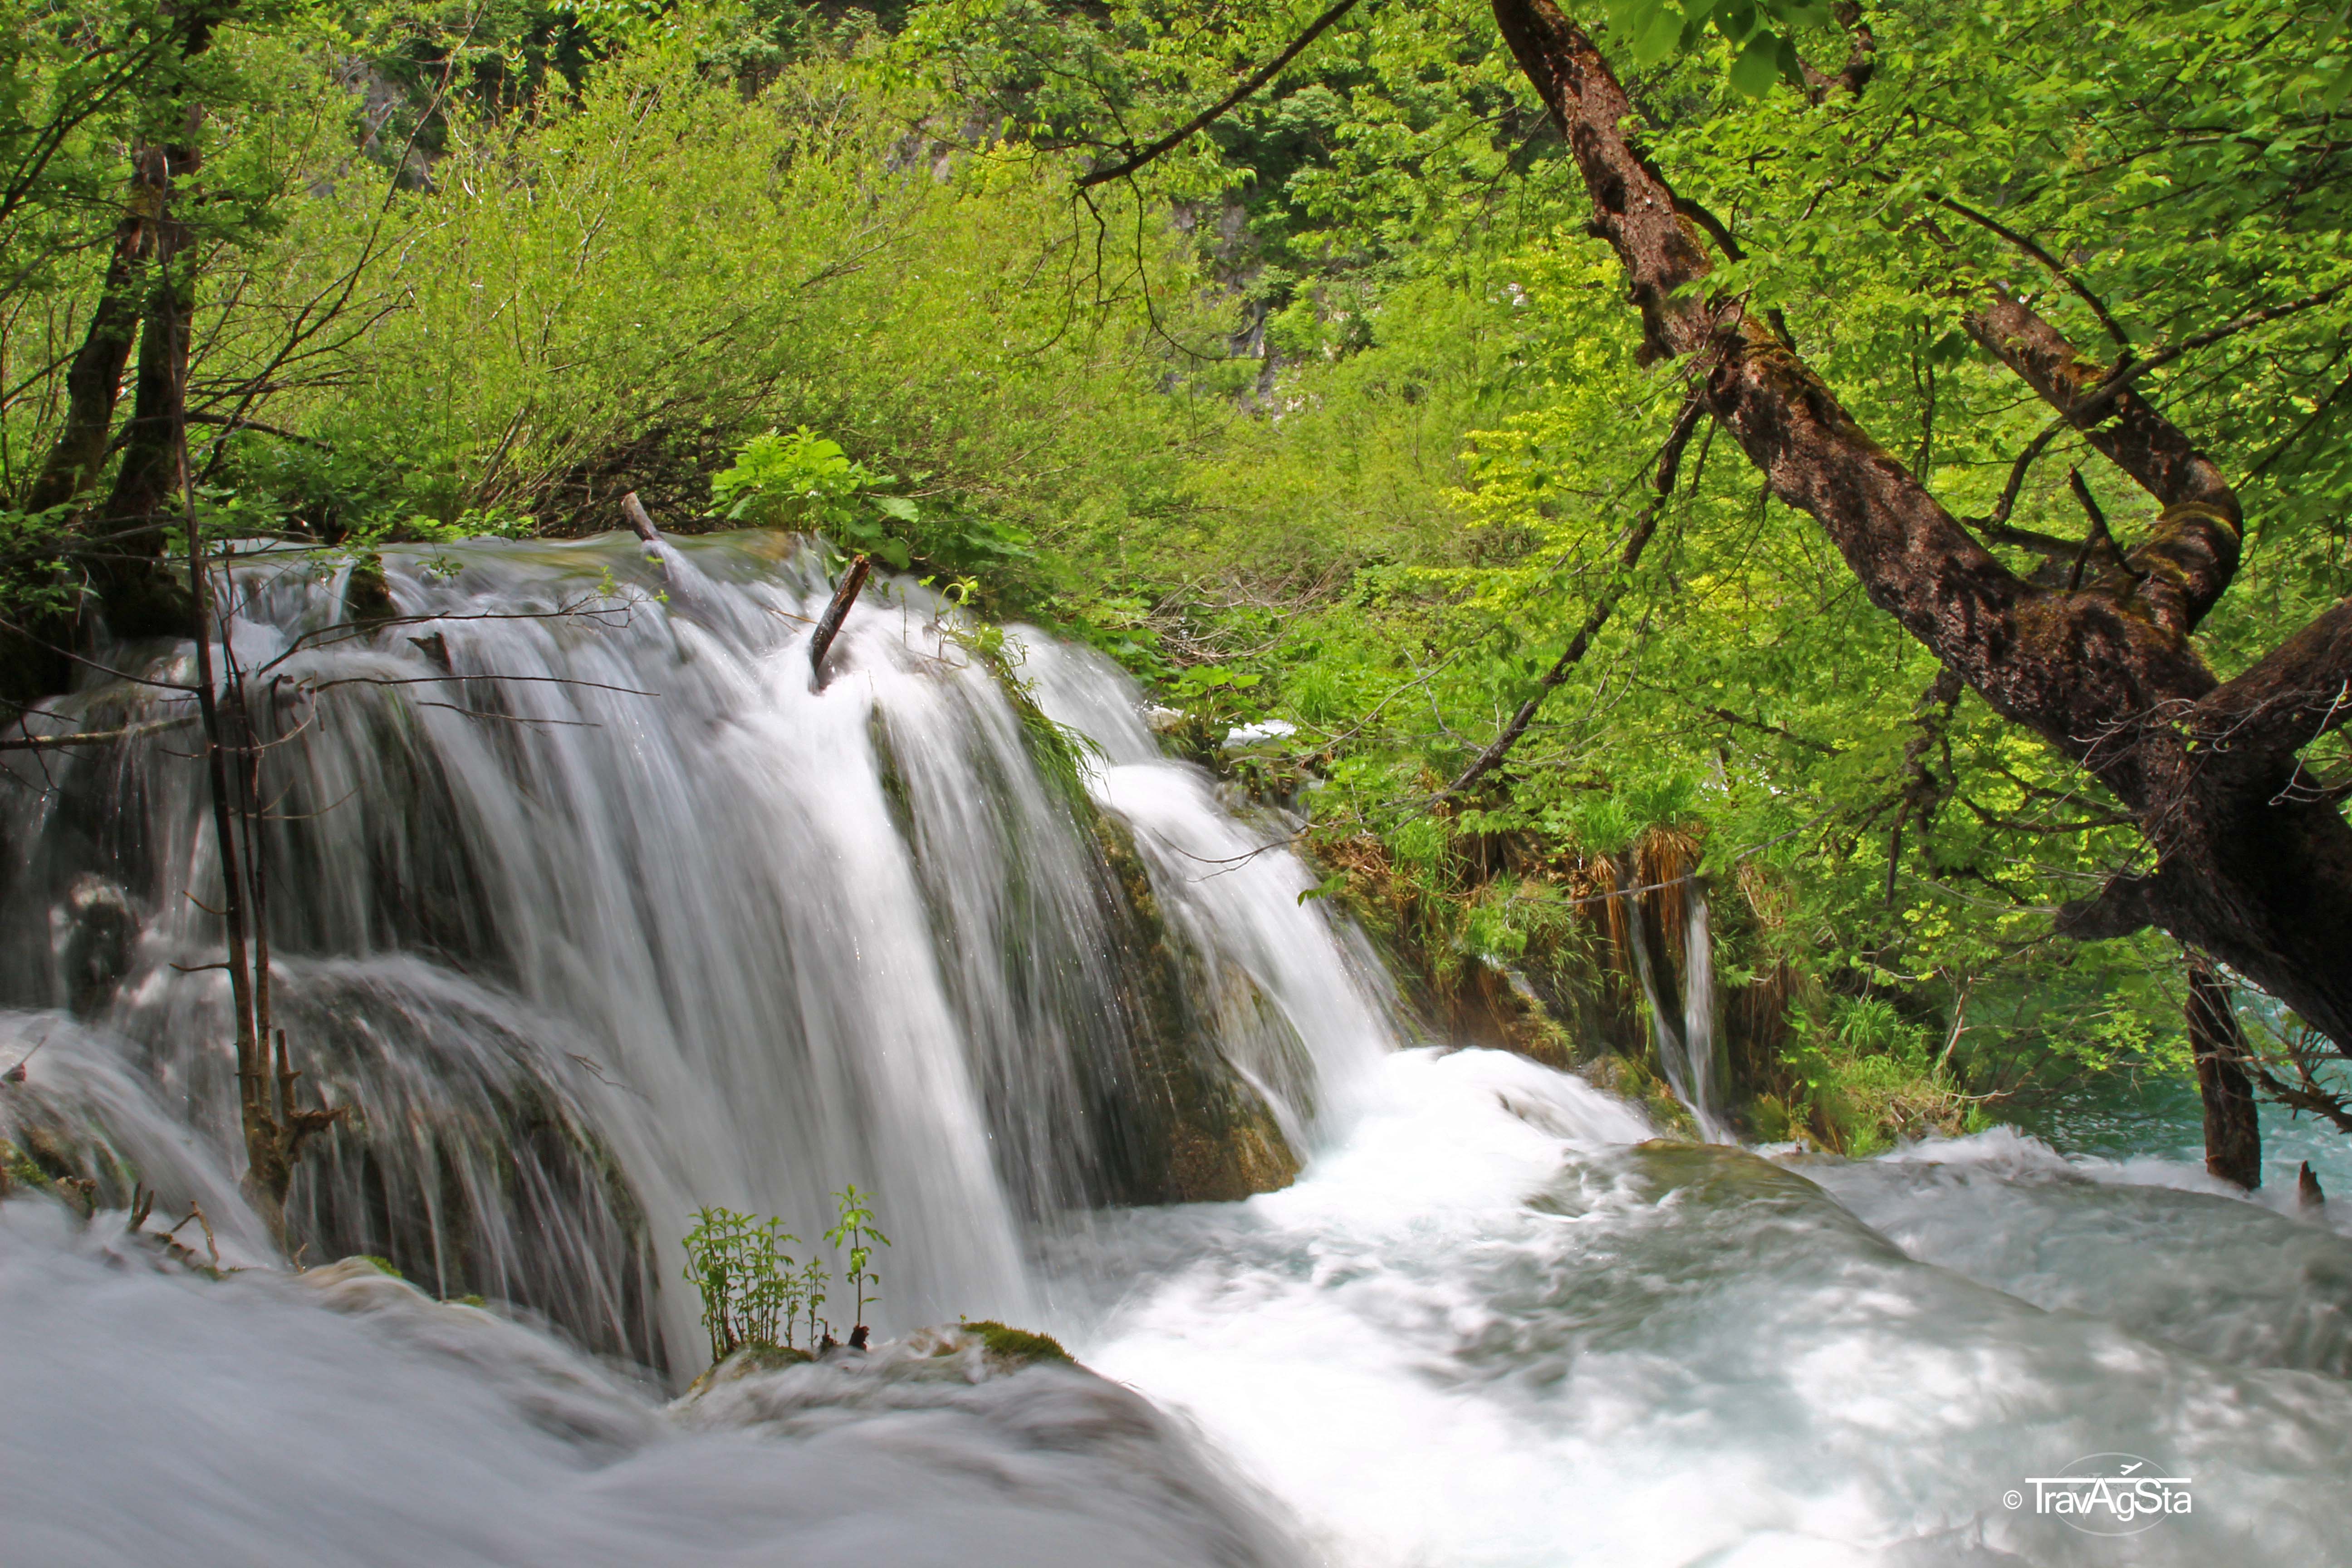
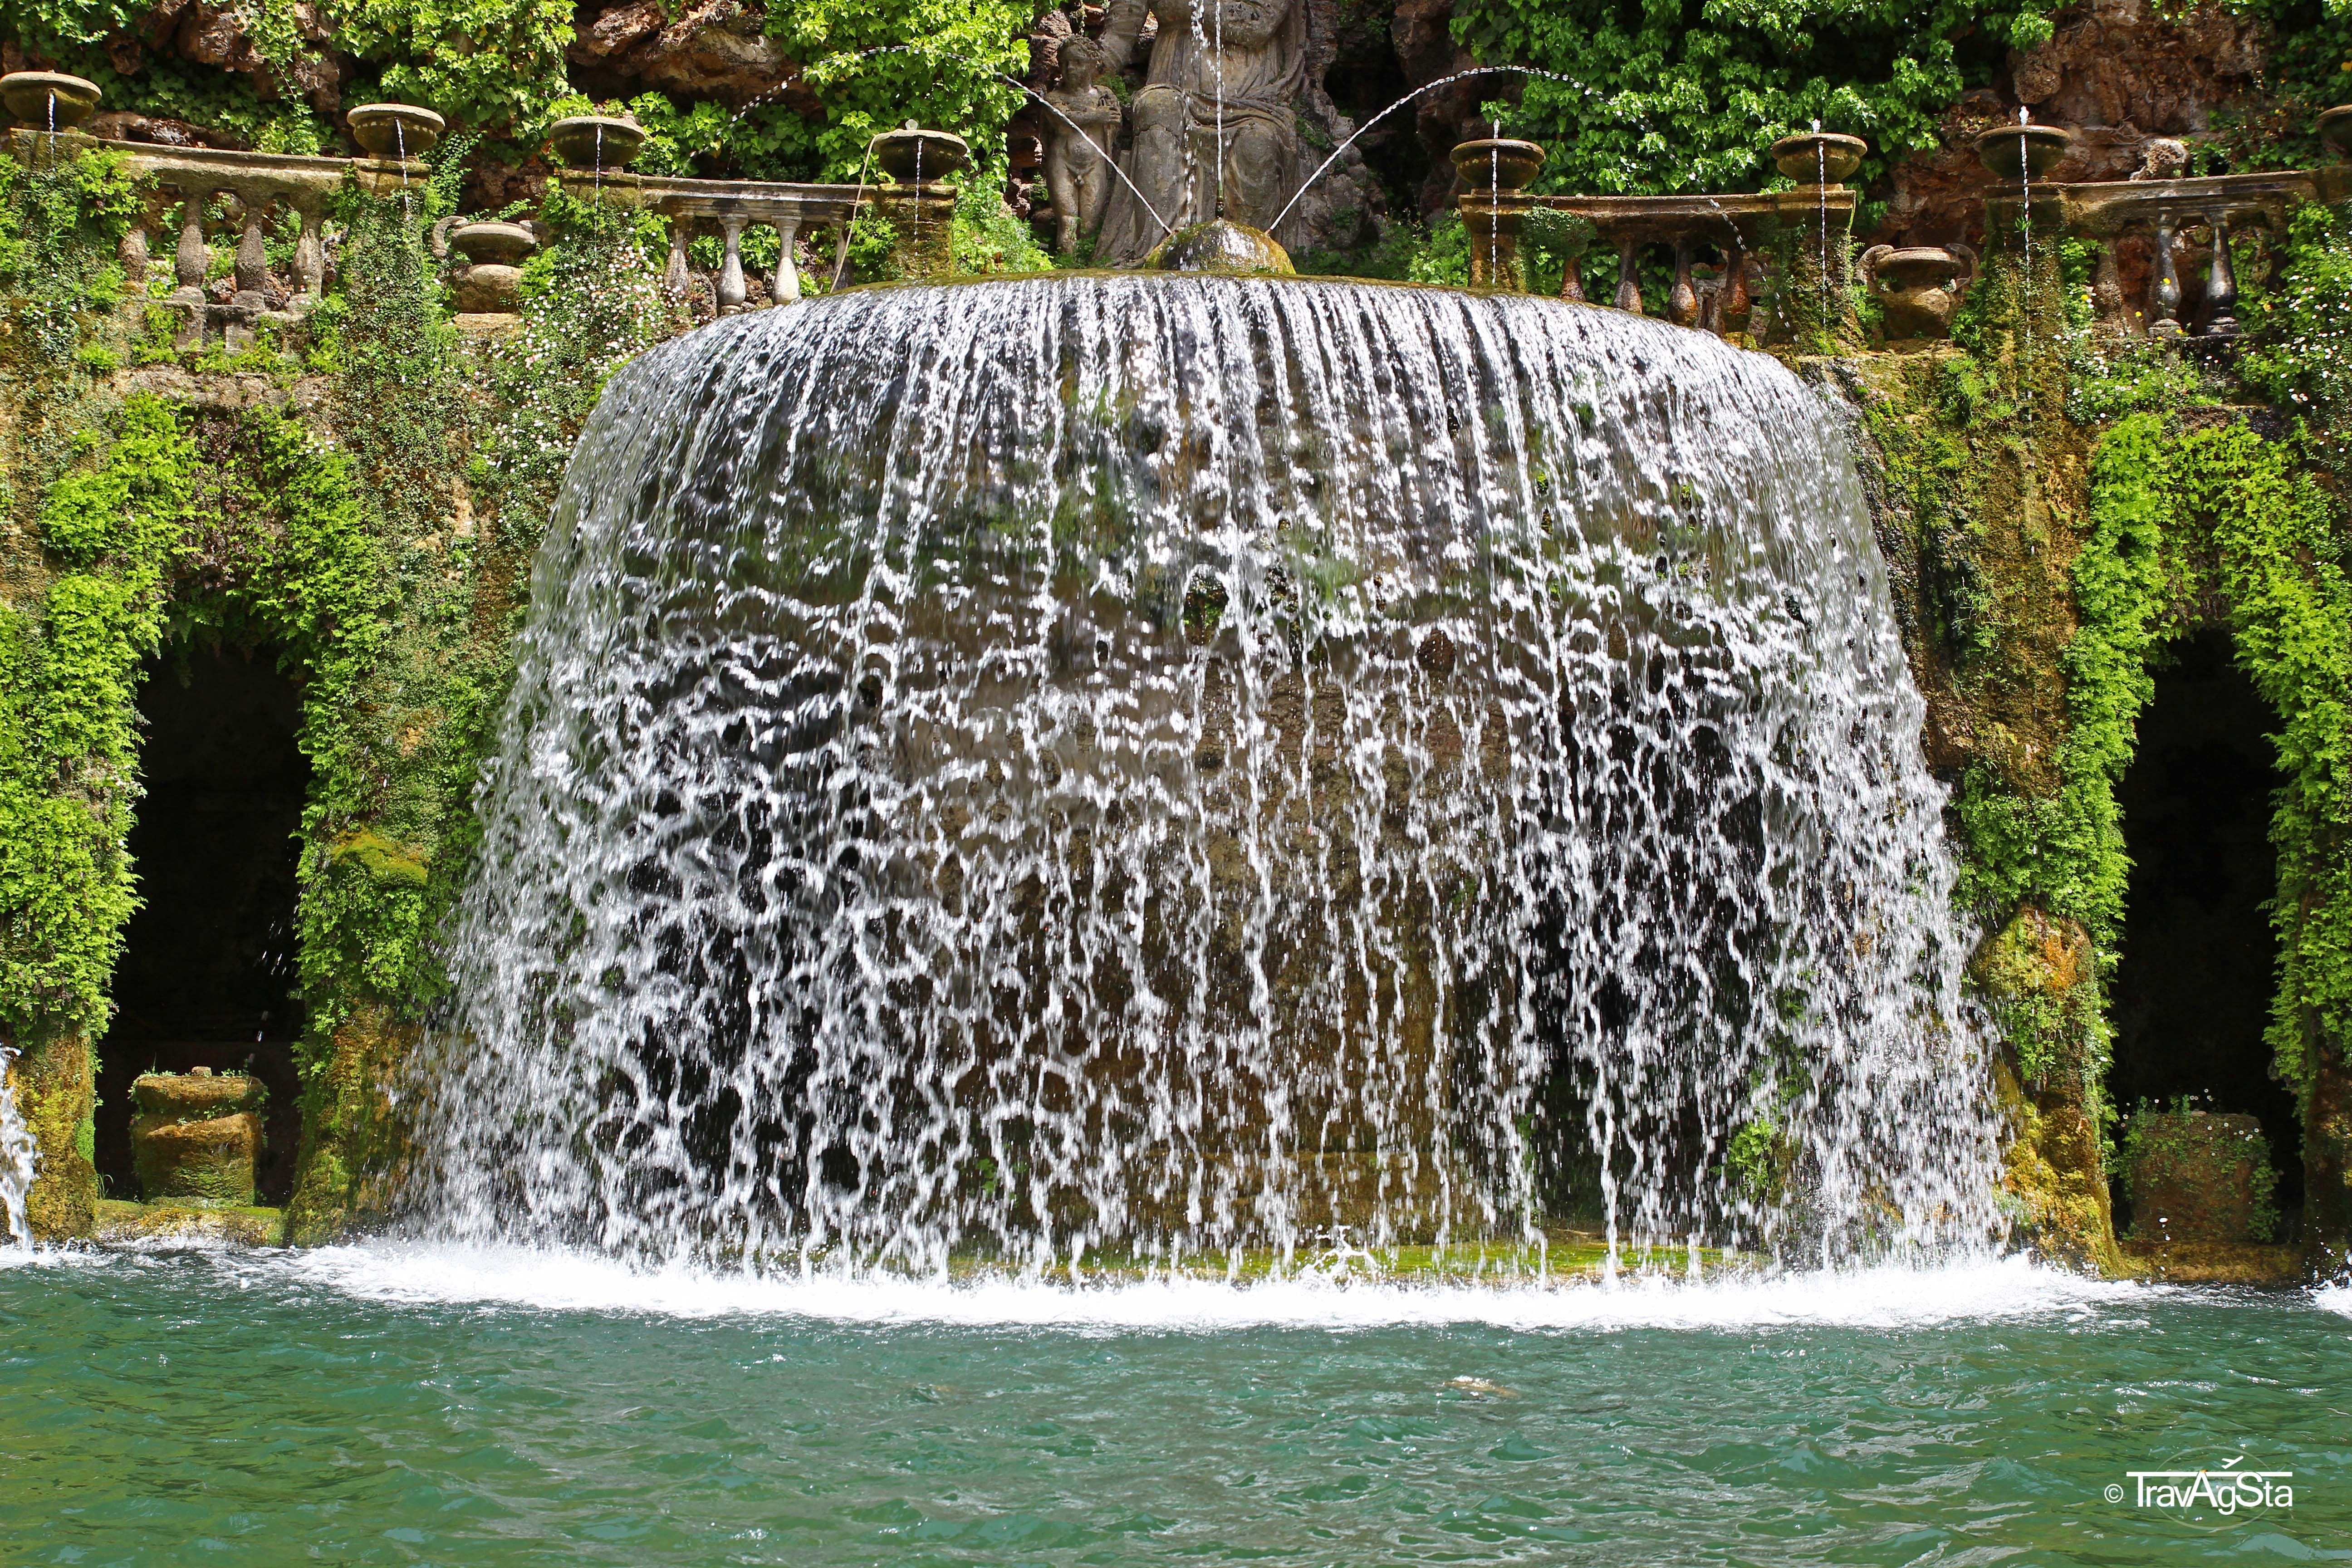
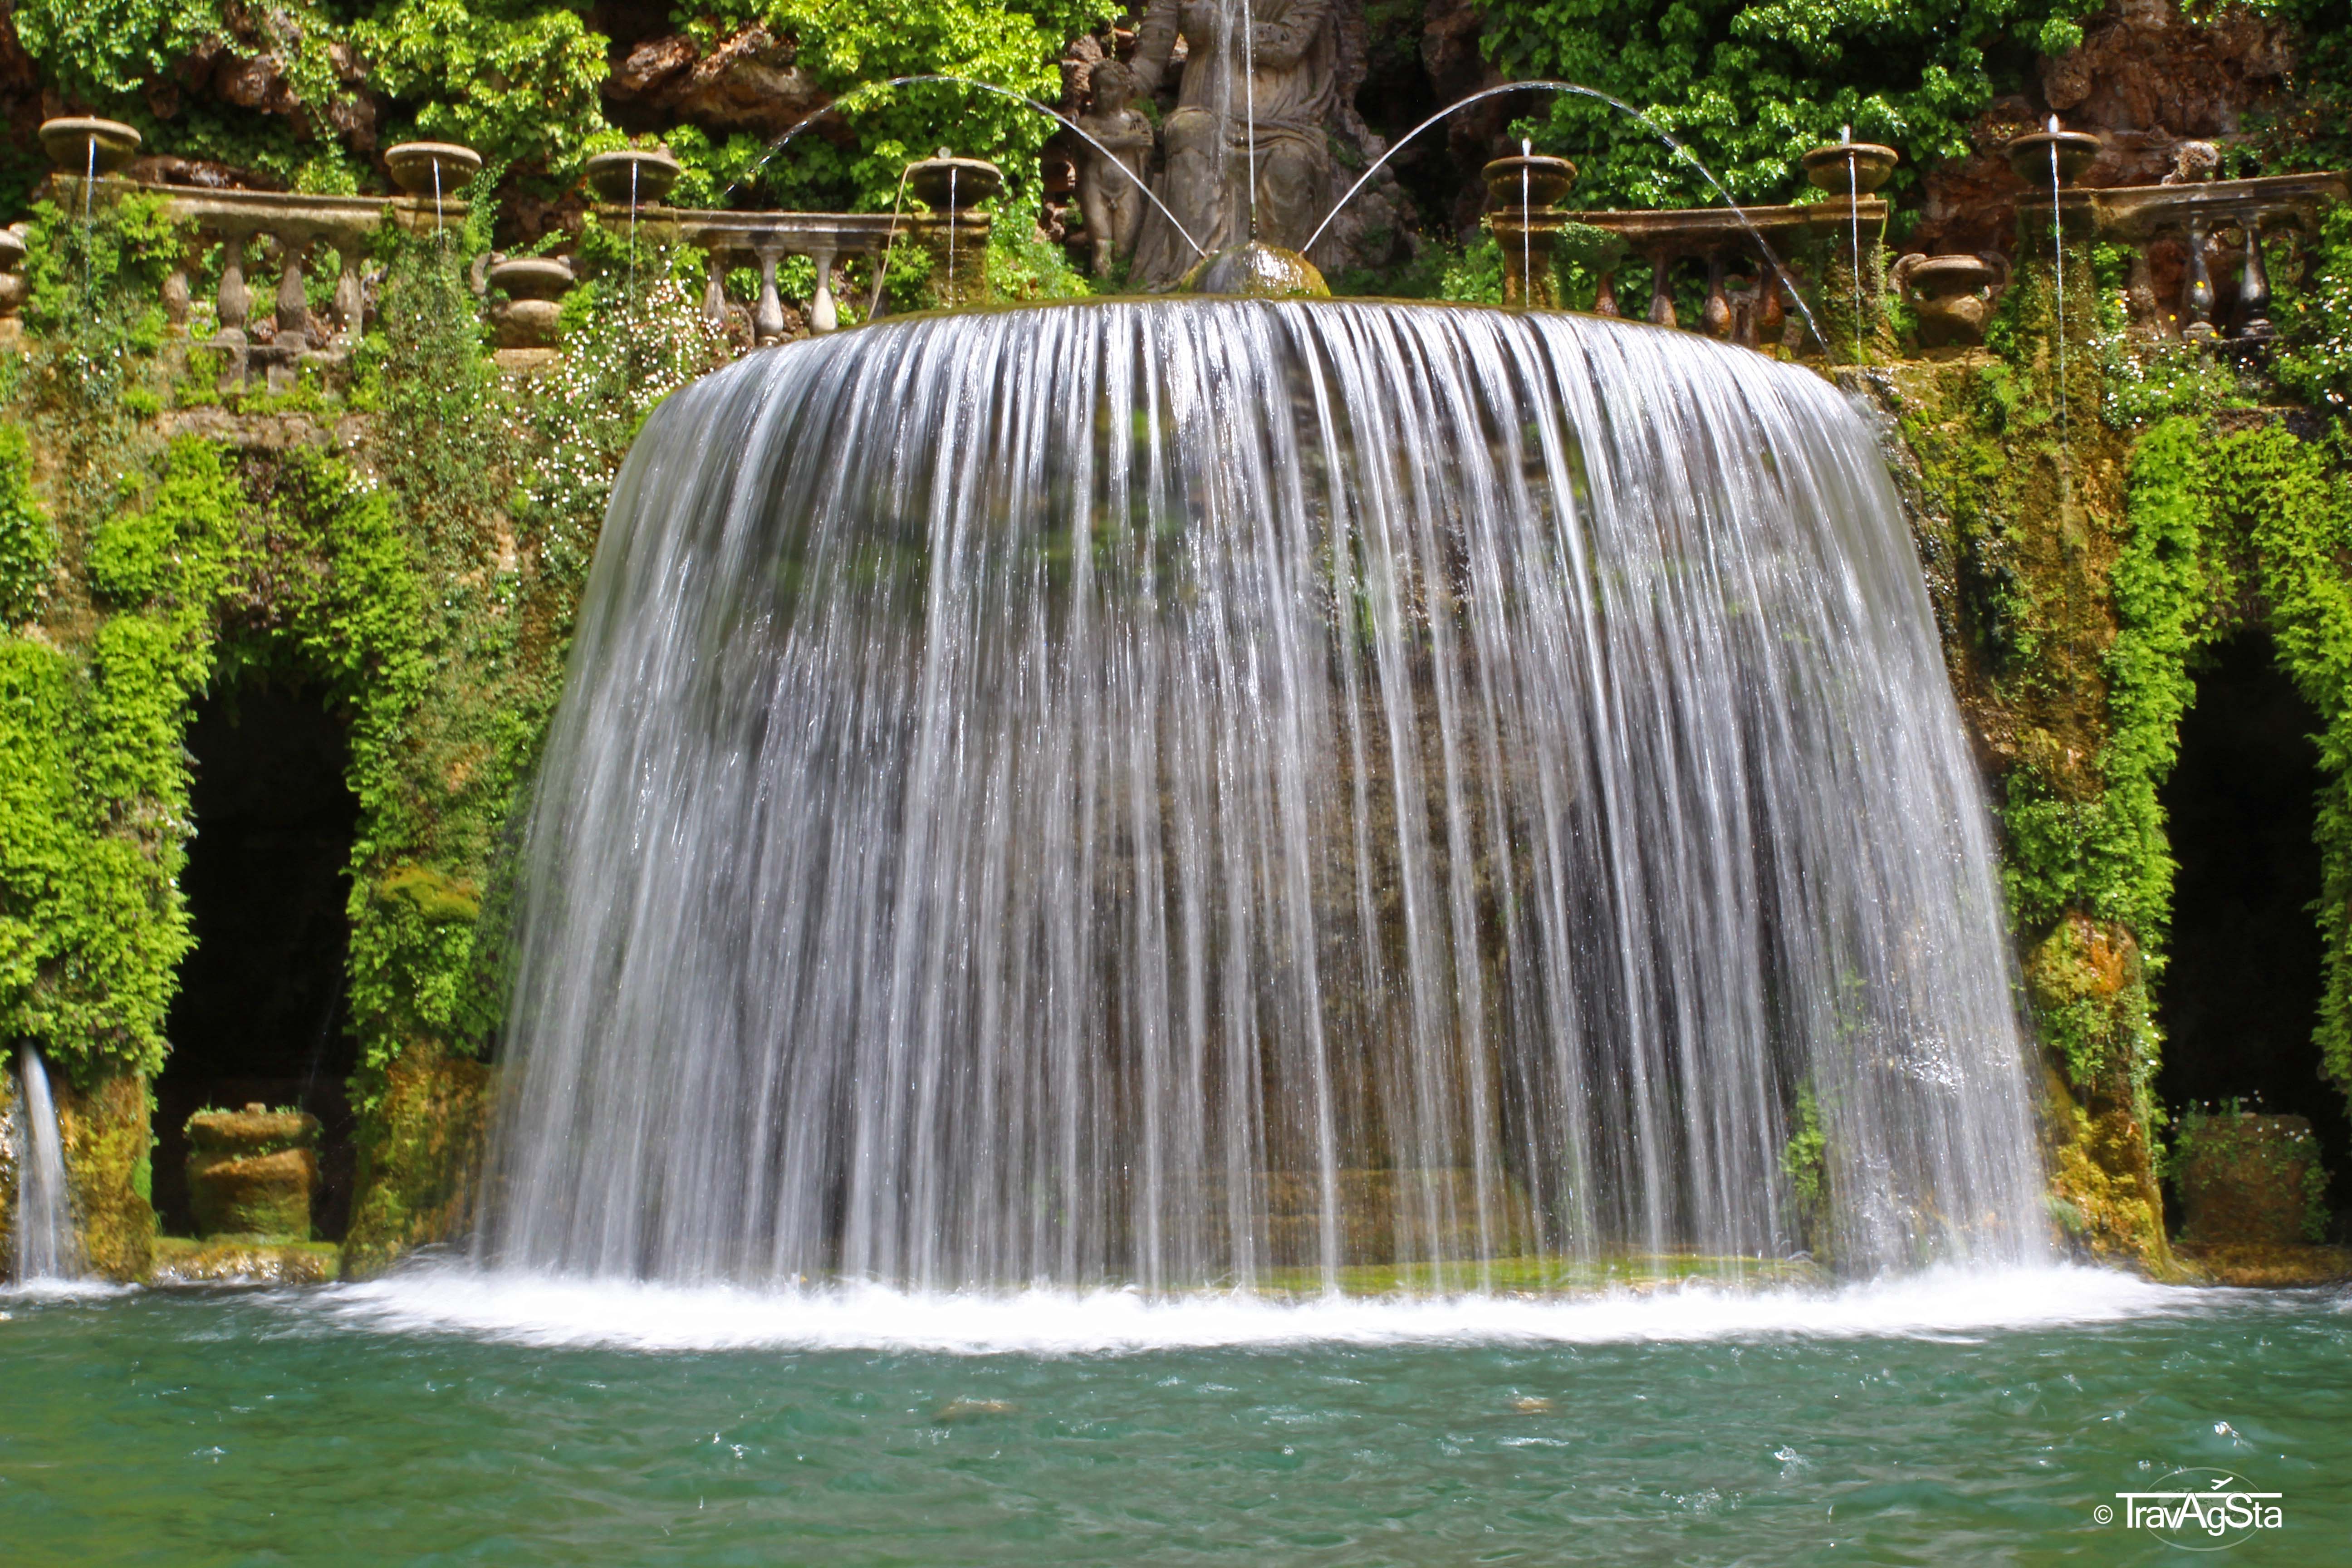
Movement:
The following photos have more or less the same light level, but aperture and exposure time are completely different. The combination yields the same result, while the effect is different. The longer exposure time captures the movement of the water and the picture appears ‘flowing’. Simple way is to choose Tv mode and set exposure time to about 1/10 second. Keep a steady handy or use a tripod.

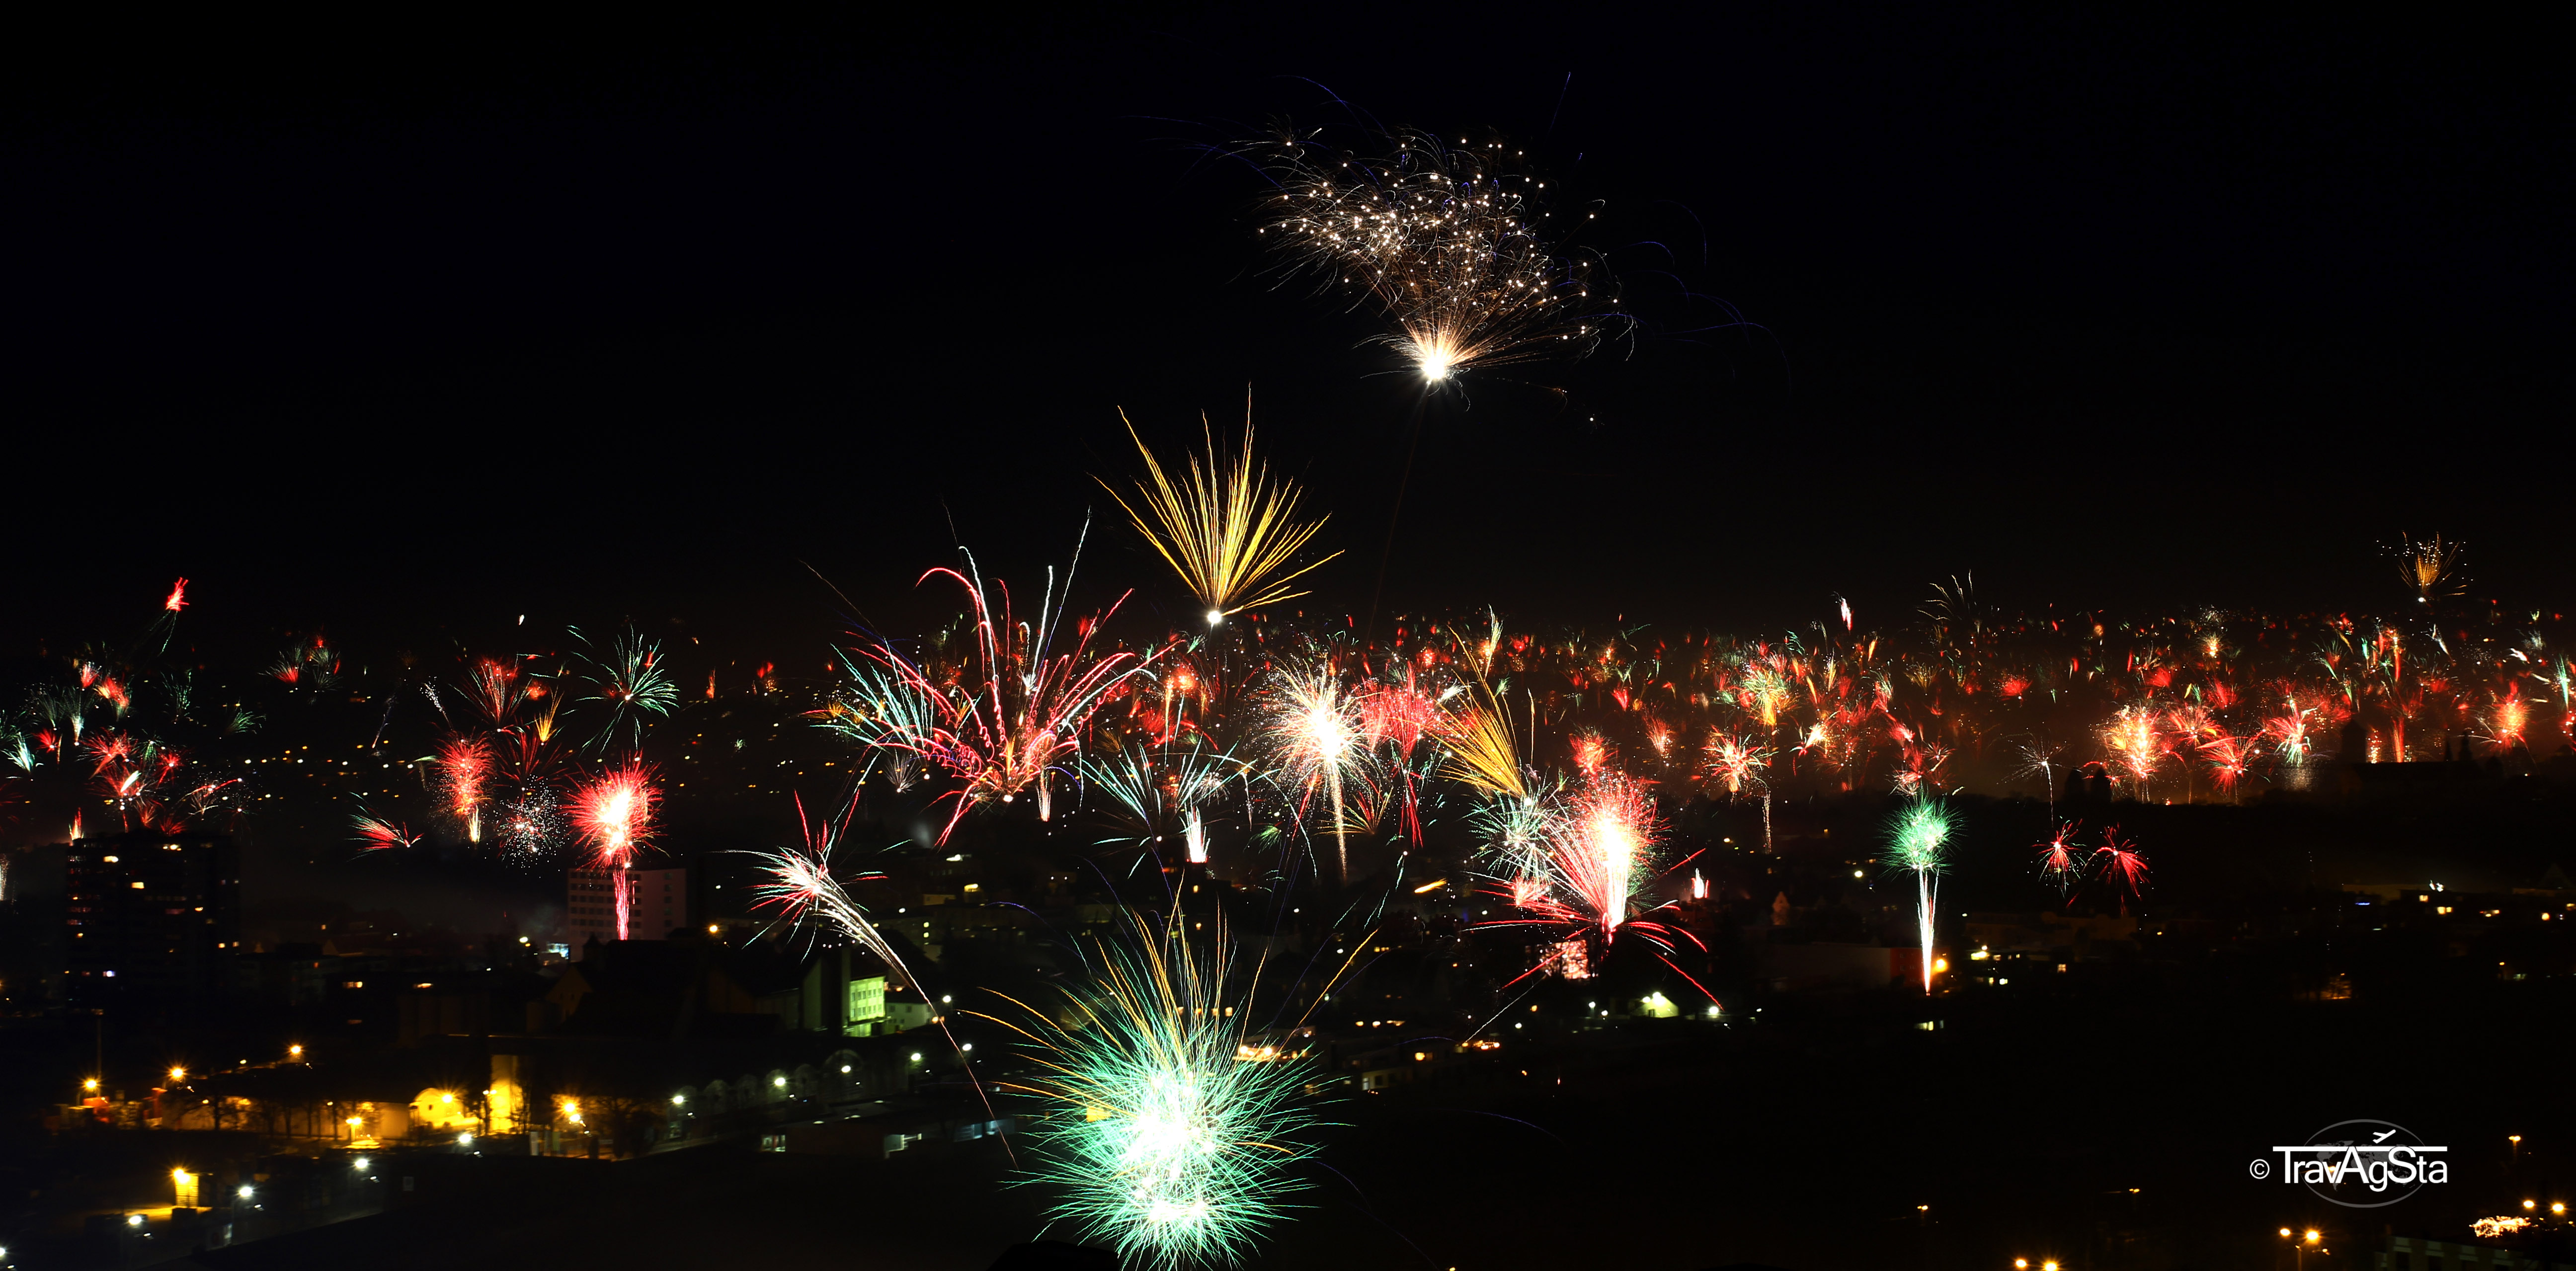
For extreme exposure times (58 seconds in the fireworks example), use M mode. I chose a medium aperture and ISO 100 for low noise.
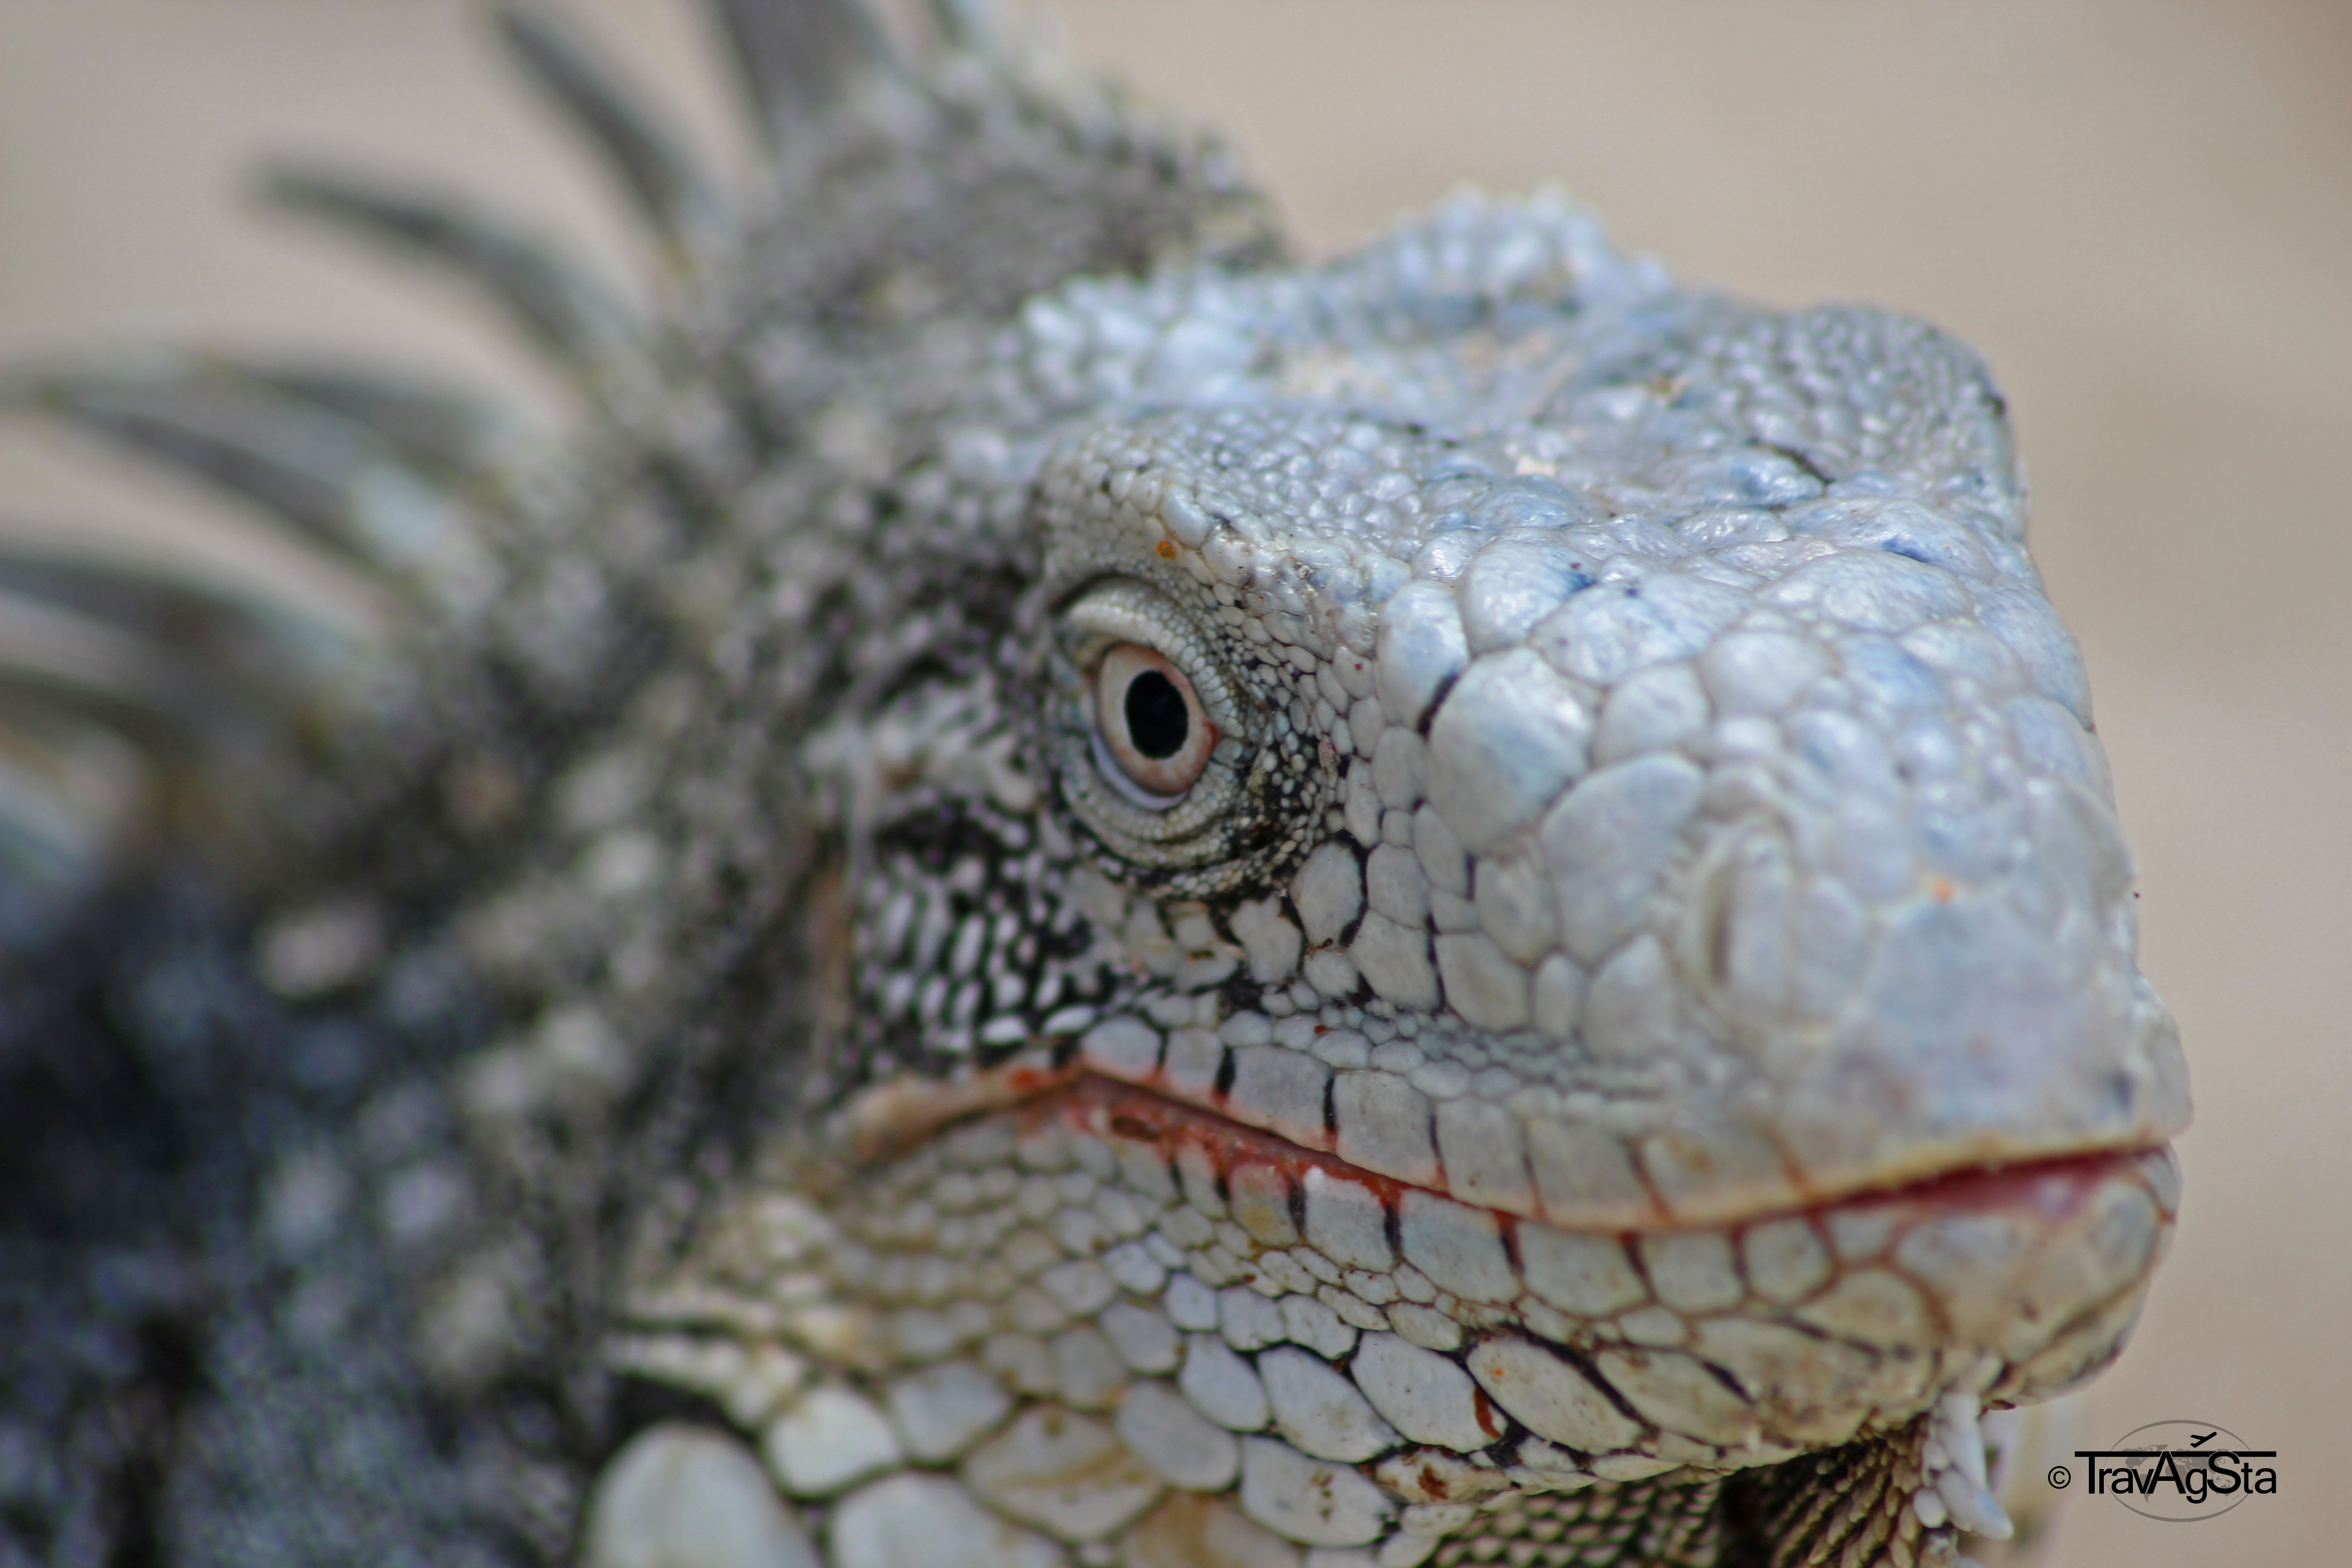
Depth of focus:
The lower the aperture value (the larger the hole), the lower is the depth of focus. In high focal lengths (while zoomed), the effect is much stronger than in low ones. The combination of high focal lenth and a low aperture value makes only small areas completely focussed. Some milimetres away from the focus point, it is already blurry. You can capture great effects, but, of course, it might be difficult to get the focus exactly where you want it to be.
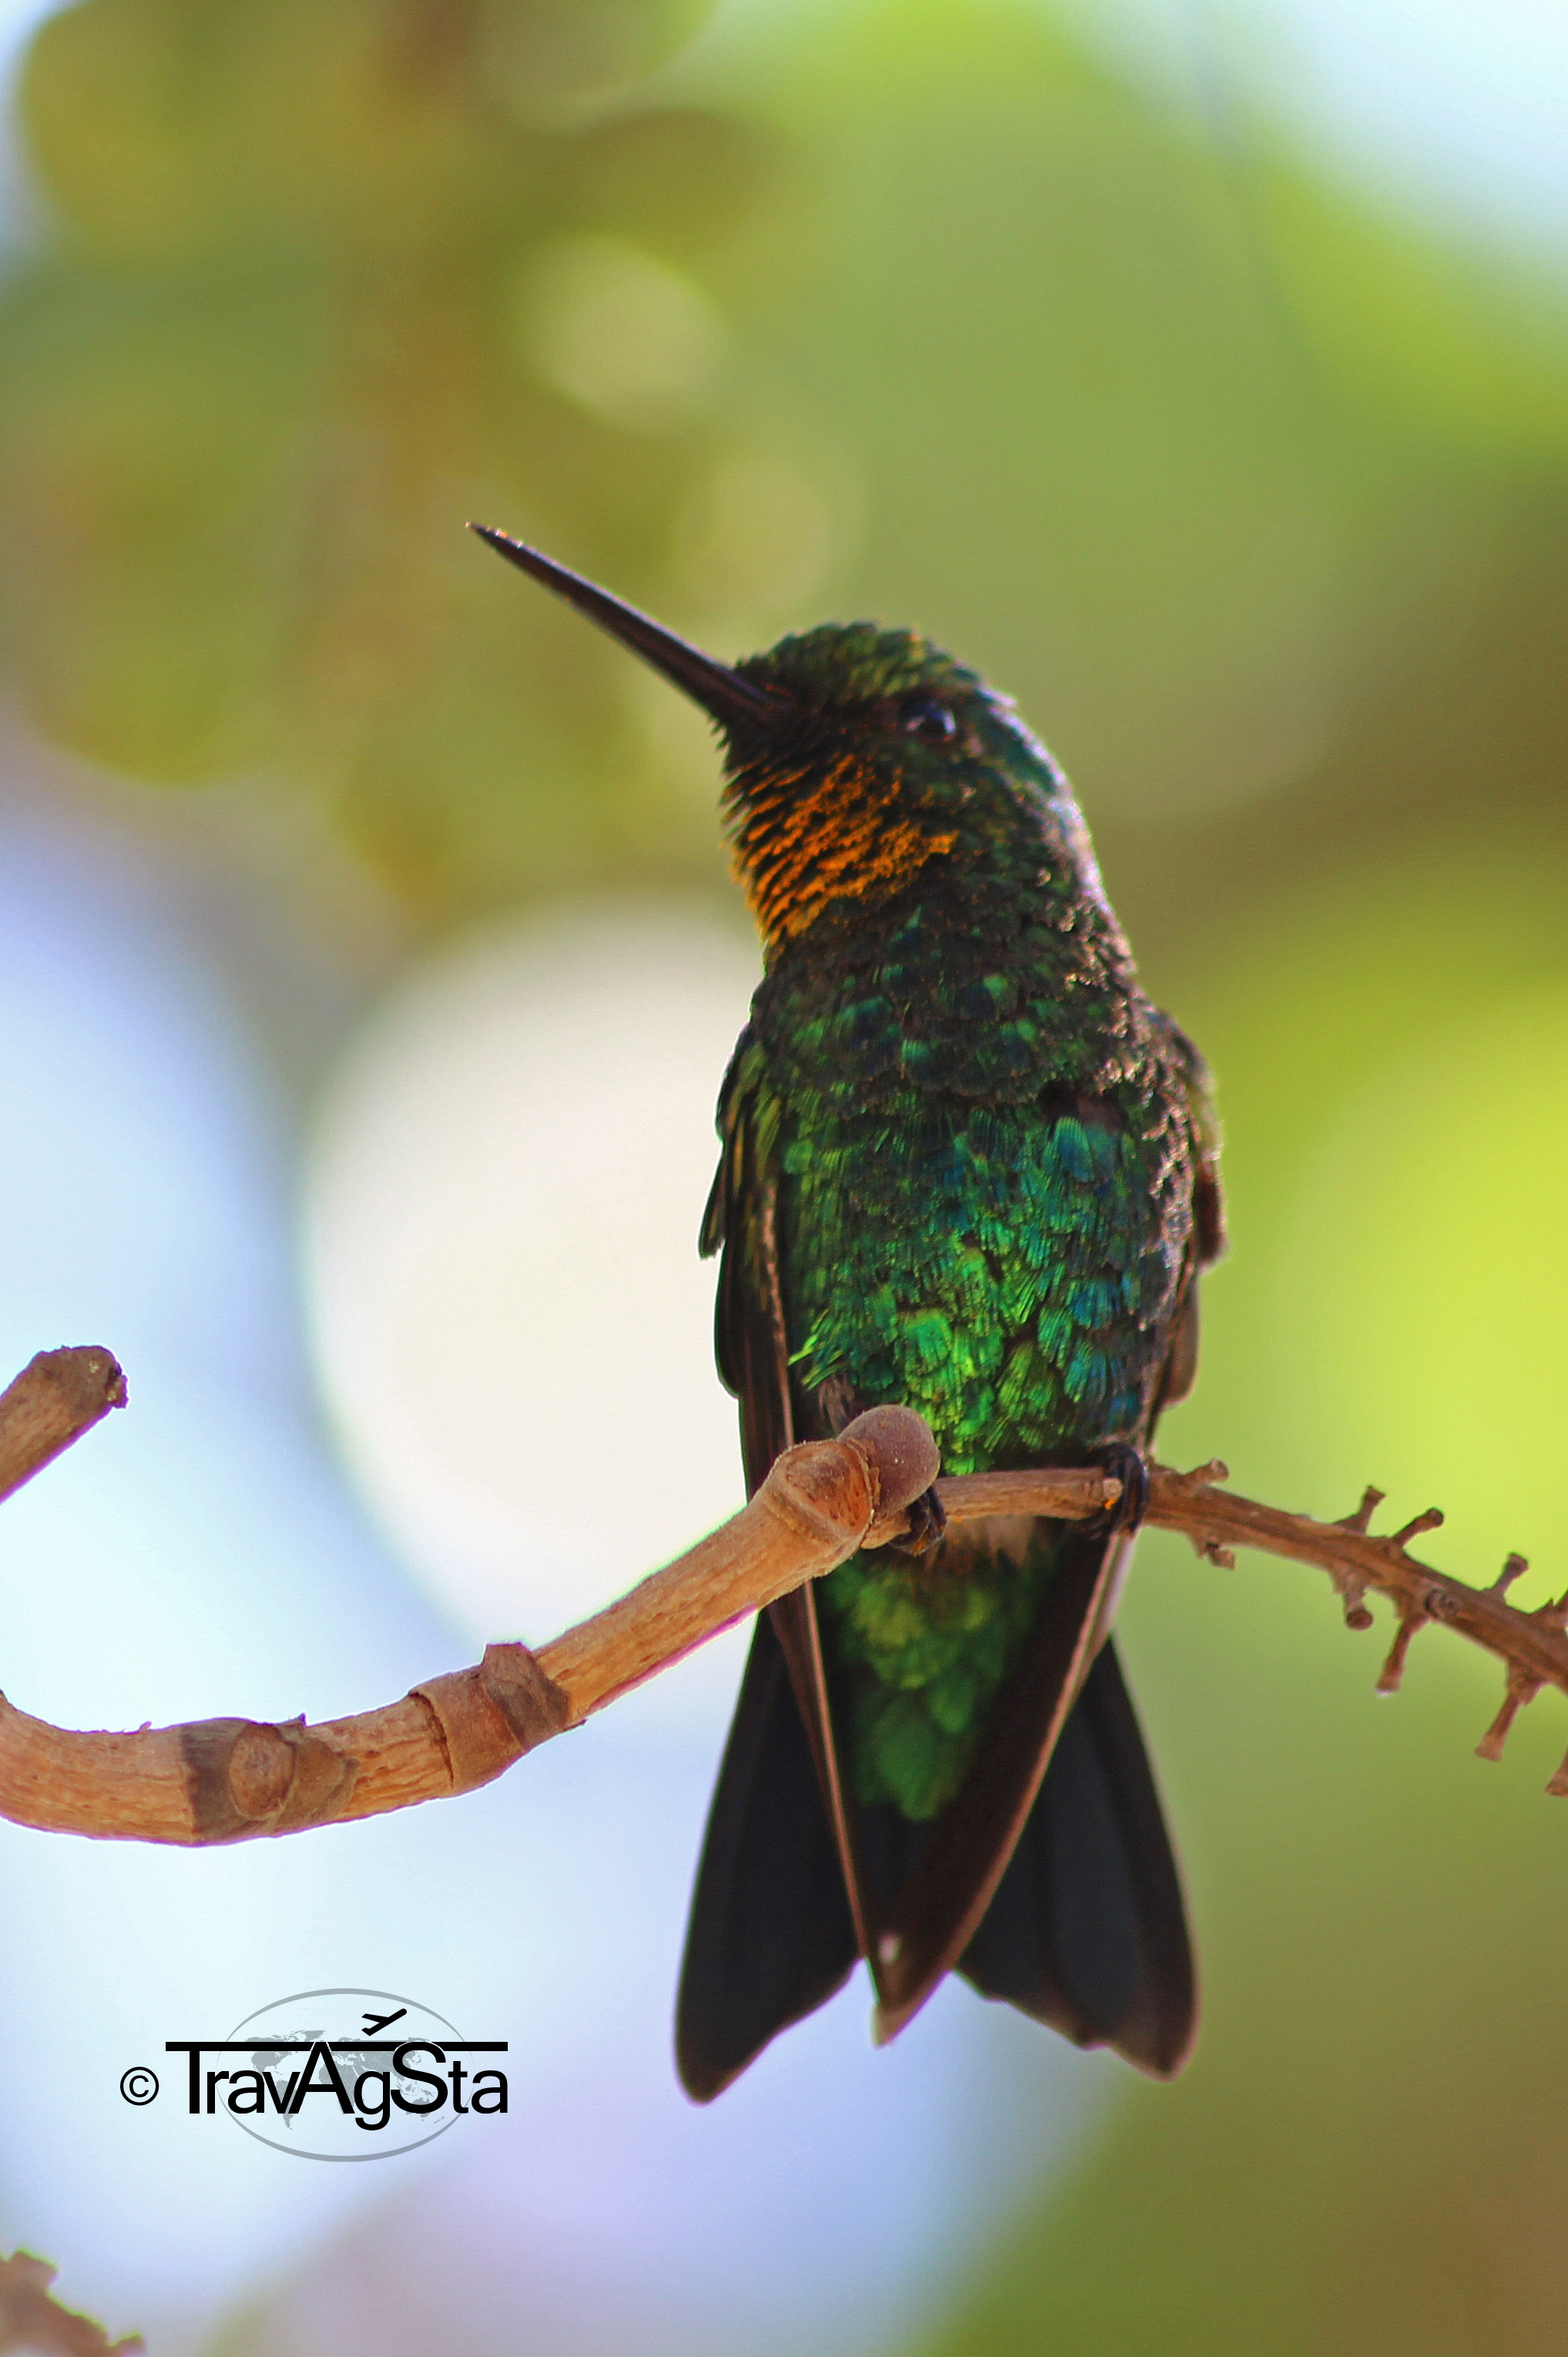
I low focal lengths (less zoomed) and a higher aperture value, you get photos with a great focal depth, which are focussed in all areas.

Noise:
With constant aperture and exposure time values you can change brightness by setting ISO values. In low light situations (darkness or in buildings) you still see details with higher ISO values. But this comes with a price. On the following pictures you see ‘noise’. Especially in the dark areas on the edge, it just doesn’t look nice.

Do you have questions or remarks? Hints? Don’t hesitate! I’m lookings forward to comments or mails!

Leave a Reply